

AtomEmailPro User Manual
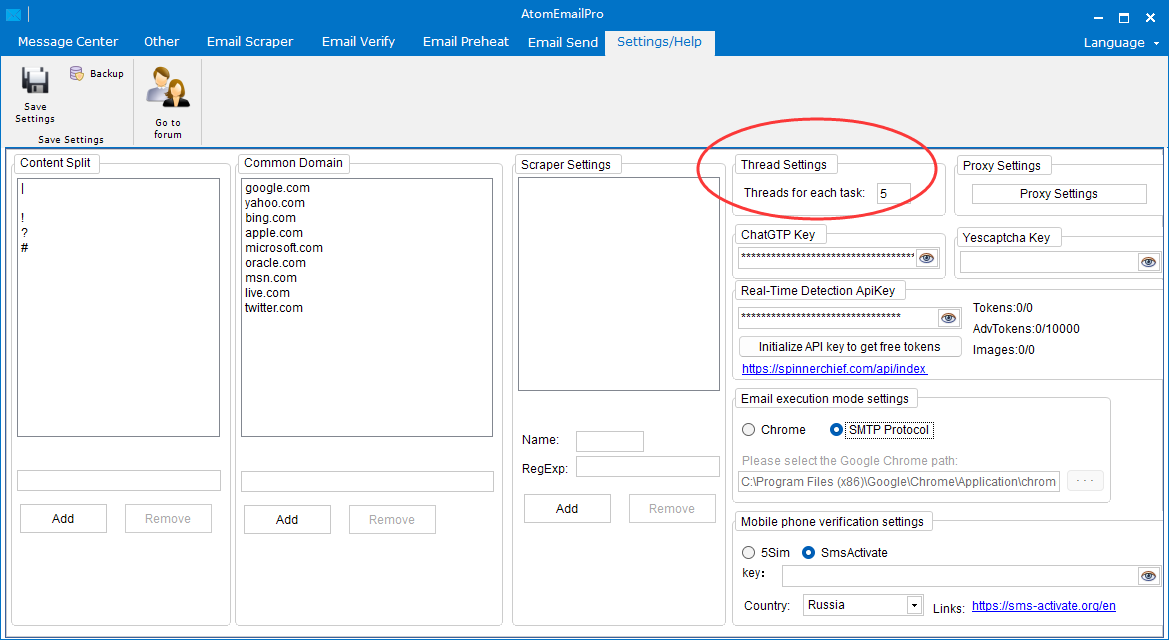
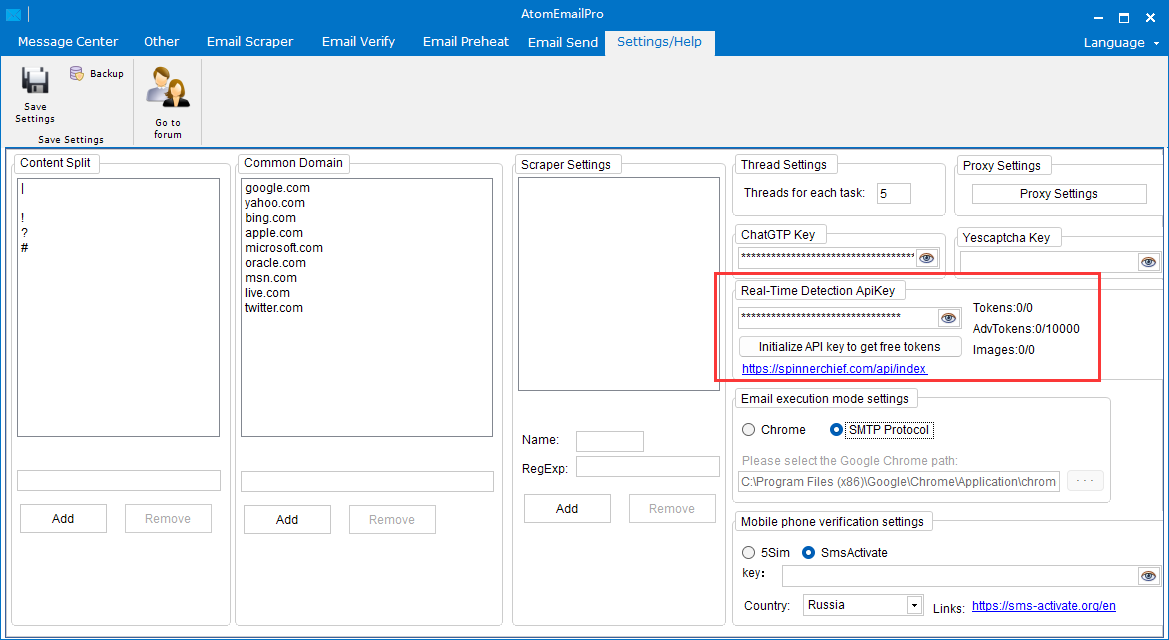
First, in the settings tab, choose the email sending method: webmail send or SMTP send.
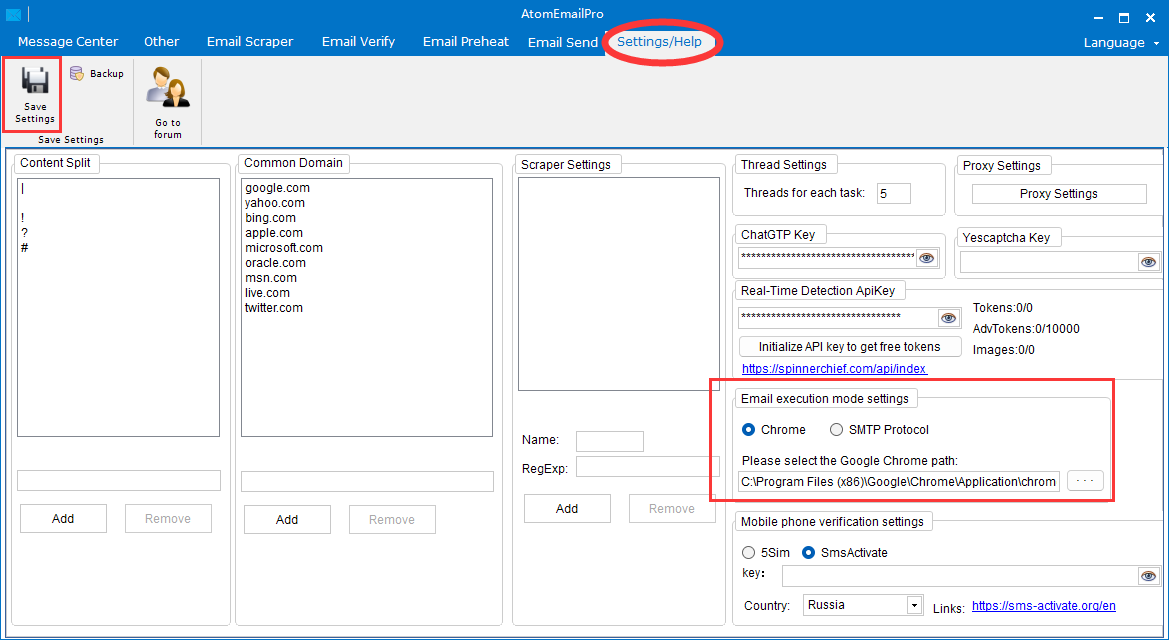
If you want to use SMTP sending, select "SMTP Protocol" and save the settings.
If you want to use webmail sending, select "Chrome," then correctly set the file path of Google Chrome on your computer, and save the settings.
Next, click on the email send tab to enter the email sending module.
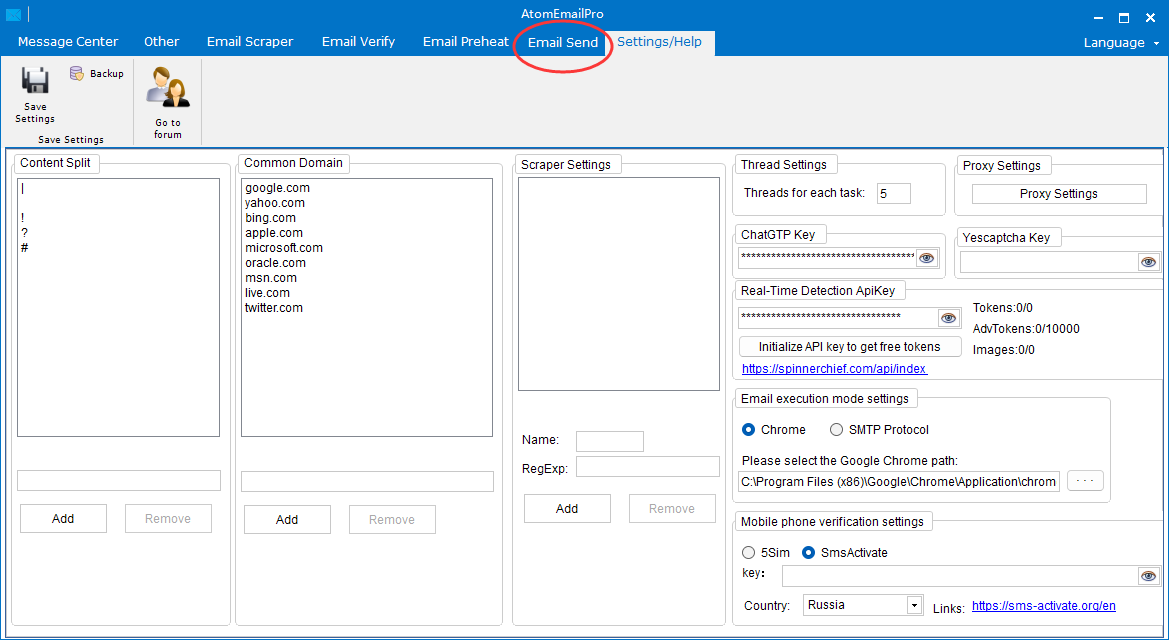
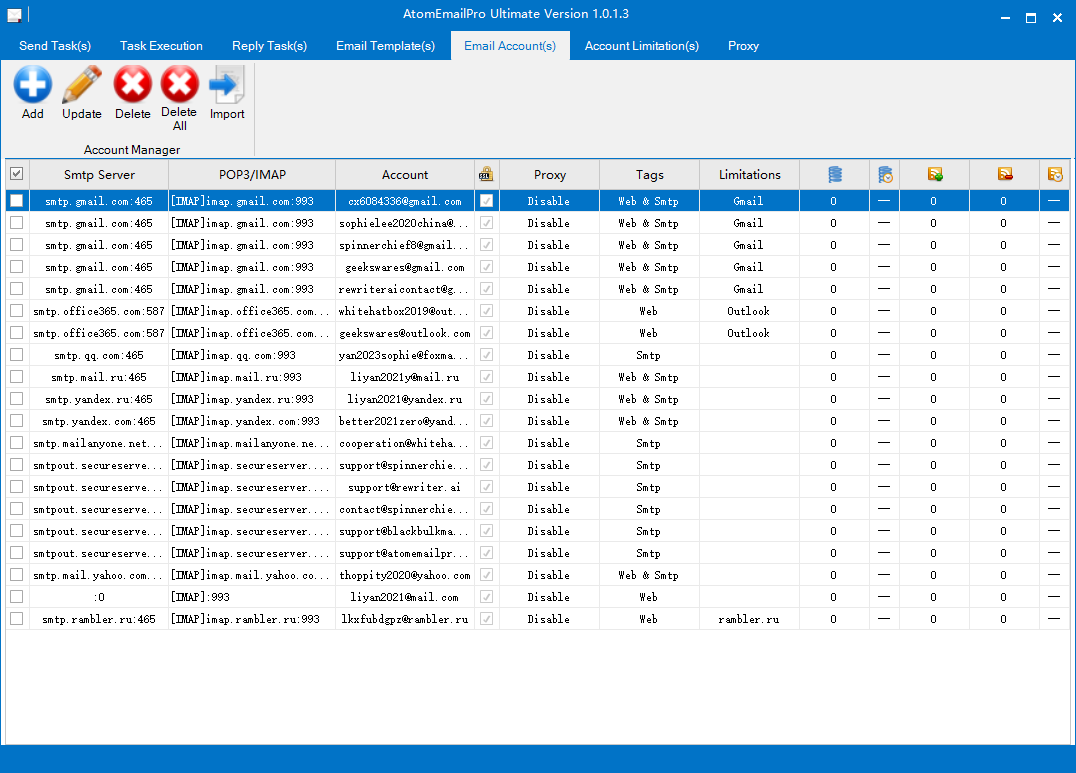
After clicking the email send tab, you can add, edit, import, or delete accounts in the email account tab.
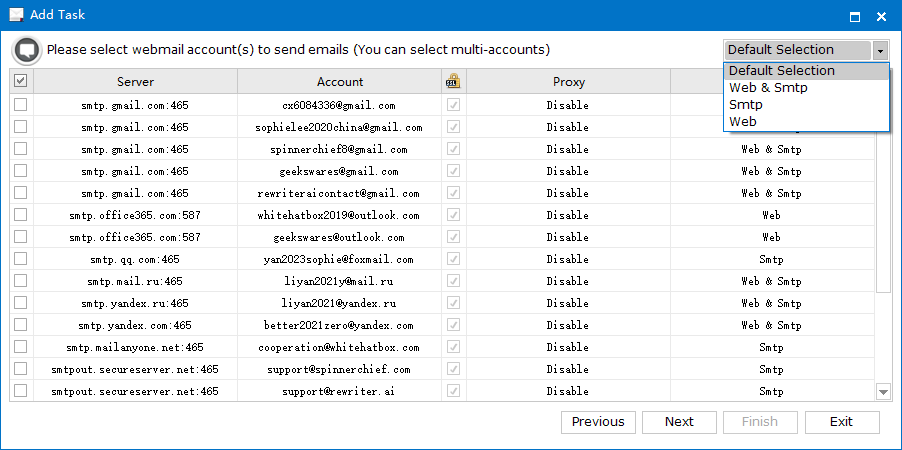
This is a screenshot of the account adding interface:
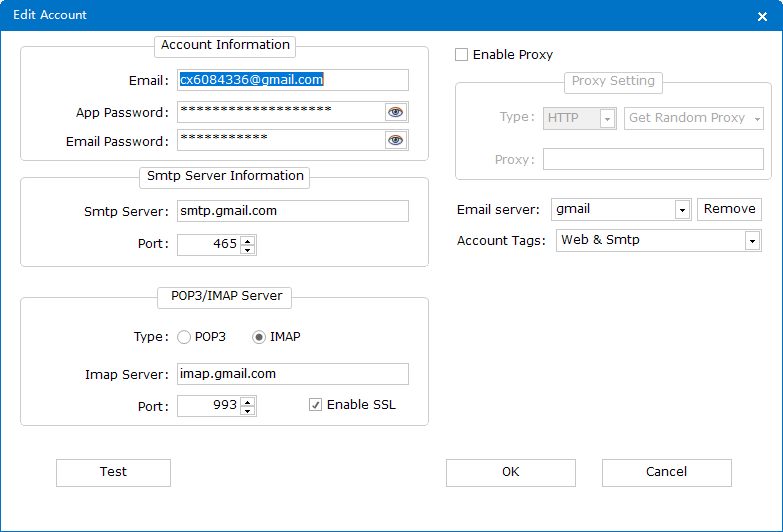
app passwordis necessary for SMTP sending.smtp serverandportare necessary for SMTP sending.email passwordis necessary for webmail send.
You can also choose account tags. There are three types of tags for accounts:
- Web: Accounts with this tag can send emails using the web method.
- Smtp: Accounts with this tag can send emails using the SMTP protocol.
- Web & SMTP: Accounts with this tag can send emails using both the web method and the SMTP protocol.
When there are many accounts, account tags help quickly identify which sending methods are suitable for these accounts.
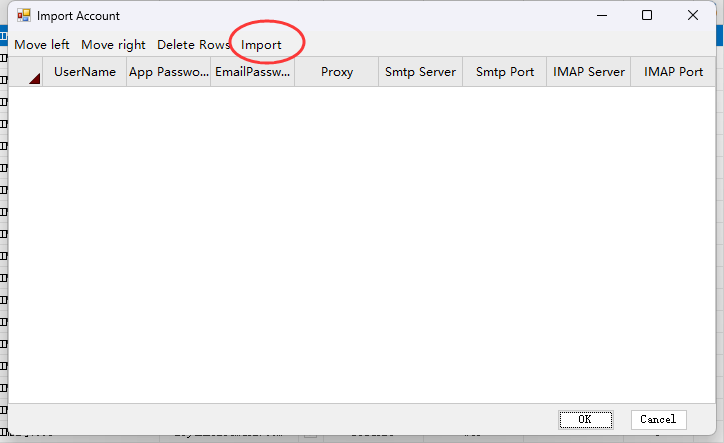
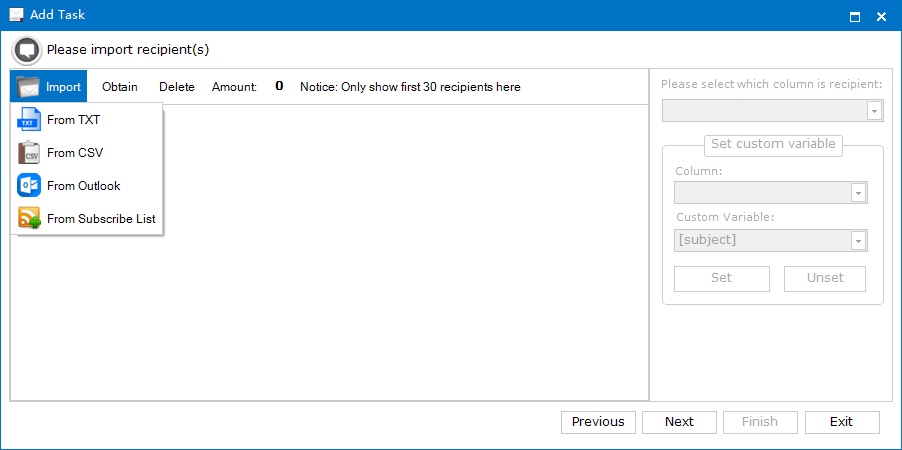
This is a screenshot of the account import interface:
Video Tutorial: https://www.youtube.com/watch?v=uiKA9TNhY_M
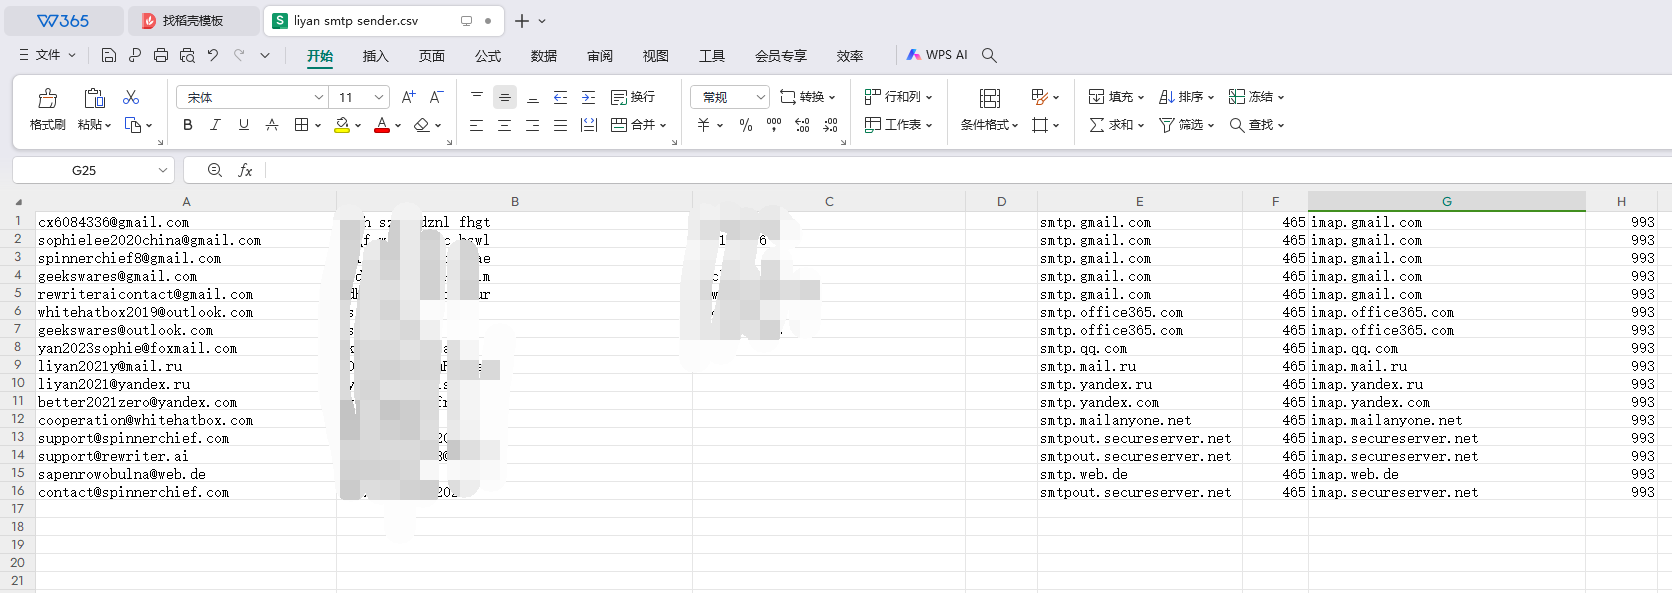
If using CSV import, the import format is:
- Column 1: Username
- Column 2: APP Password
- Column 3: Email Password
- Column 4: Proxy
- Column 5: Smtp Server
- Column 6: Smtp Port
- Column 7: IMAP Server
- Column 8: IMAP Port
Note: If you choose the SMTP protocol sending mode in the settings interface, all information required for SMTP sending must be imported without leaving empty columns. Otherwise, the account cannot be imported. The import format is:
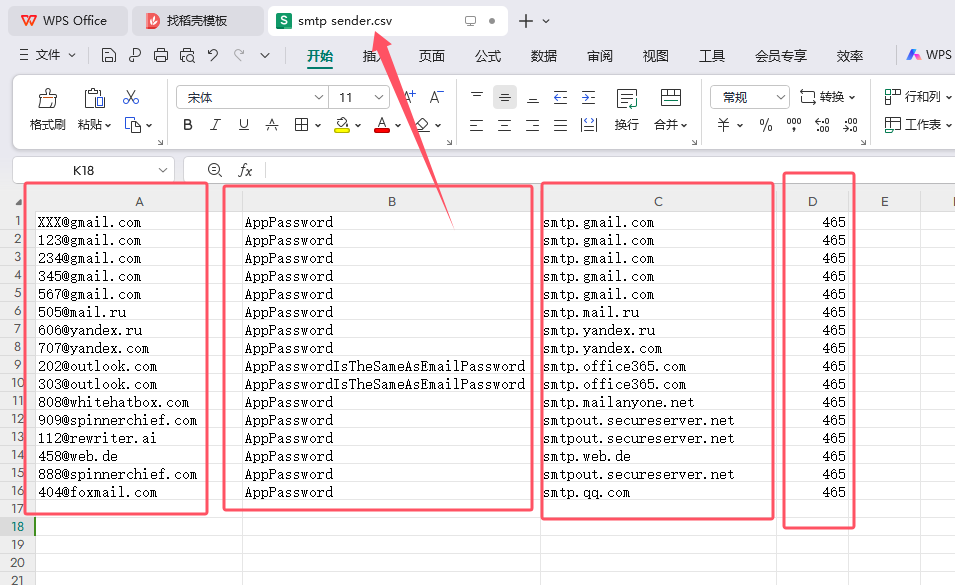
- Column 1: Username
- Column 2: APP Password (cannot be empty)
- Column 3: Email Password (can leave it empty)
- Column 4: Proxy (can leave it empty)
- Column 5: Smtp Server (cannot be empty)
- Column 6: Smtp Port (cannot be empty)
- Column 7: IMAP Server (can leave it empty)
- Column 8: IMAP Port (can leave it empty)
If you choose the Chrome sending mode in the settings interface, all information required for webmail sending must be imported without leaving empty fields. Otherwise, the account cannot be imported. The import format is:
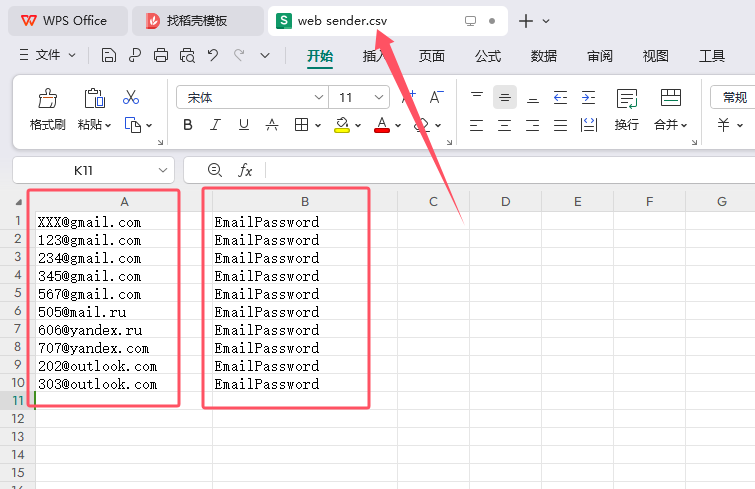
- Column 1: Username
- Column 2: APP Password (can leave it empty)
- Column 3: Email Password (cannot be empty)
- Column 4: Proxy (can leave it empty)
- Column 5: Smtp Server (can leave it empty)
- Column 6: Smtp Port (can leave it empty)
- Column 7: IMAP Server (can leave it empty)
- Column 8: IMAP Port (can leave it empty)
Sample screenshot for import:
You can also import using a txt file. The import format is: username,app password,email password,proxy,smtp server,smtp port,imap server,imap port If you don't need to import a proxy, the import format is: username,app password,email password,,smtp server,smtp port,imap server,imap port
In the account limitation interface, you can set daily, hourly, and minute limits for all sending accounts to prevent the number of sent emails from exceeding the maximum daily sending limit.
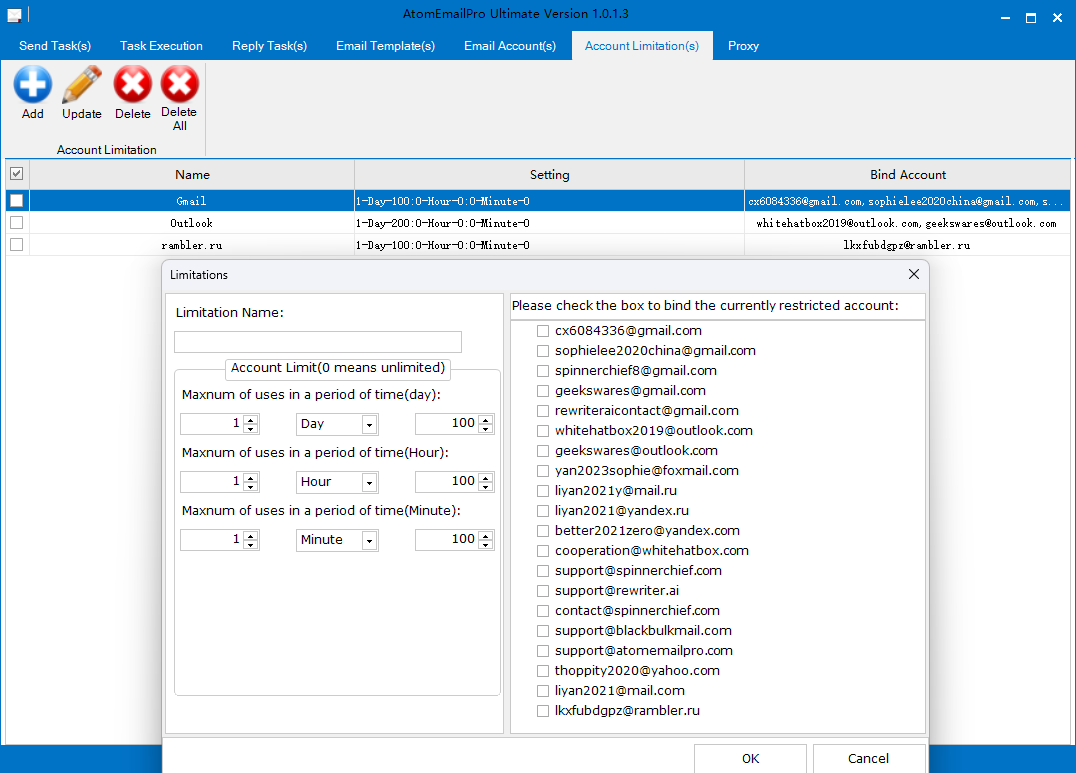
Click here to see the sending limit for each mailbox.
In the email template interface, you can add, delete, edit, and copy email templates.
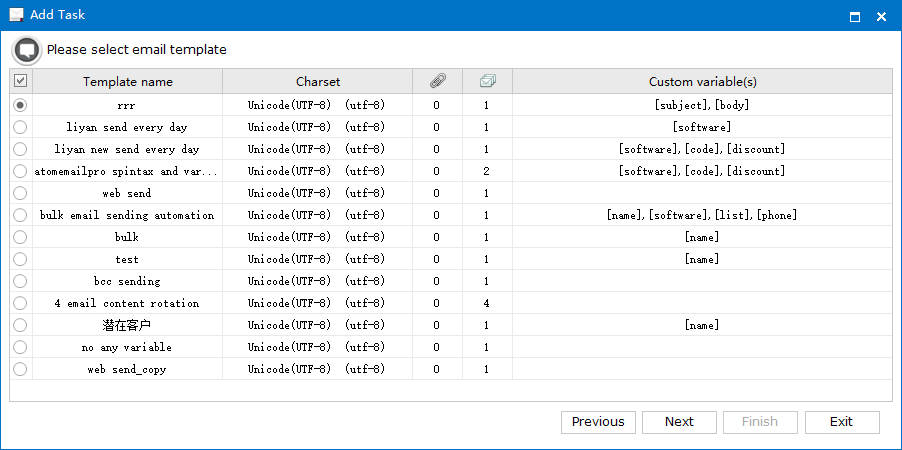
This is a screenshot of the email template adding interface:
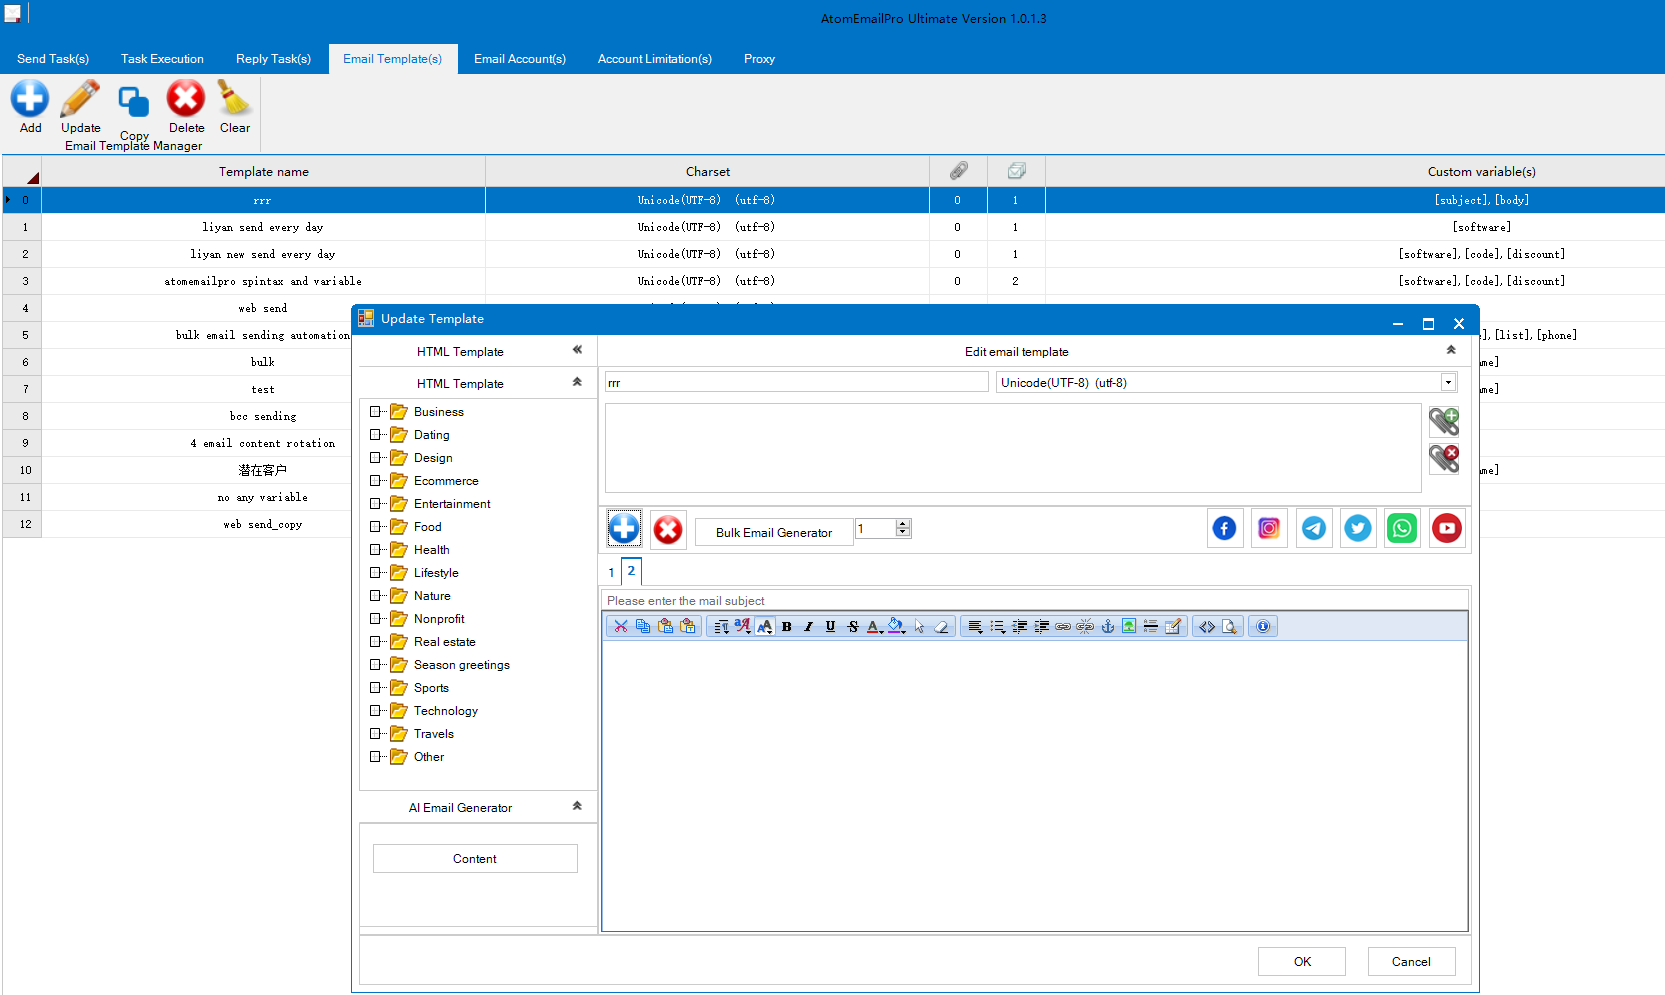
- Supports plain text emails
- Supports HTML text
- Supports attachments
In one email template, you can add multiple email contents for the system to randomly select and rotate the email content for sending.
Additionally, if you need to add variables, the format for all variables is: [variable], for example, [name].
If there are one or more variables in the email template, please import the recipients using a CSV file. In the file, the first column is the recipient's email, and other columns are variable columns, one variable per column.
Note: If there are variables in the email template, you cannot use the BCC mode to send emails, only the TO mode.
In the send task interface, you can add, delete, edit, and copy tasks.
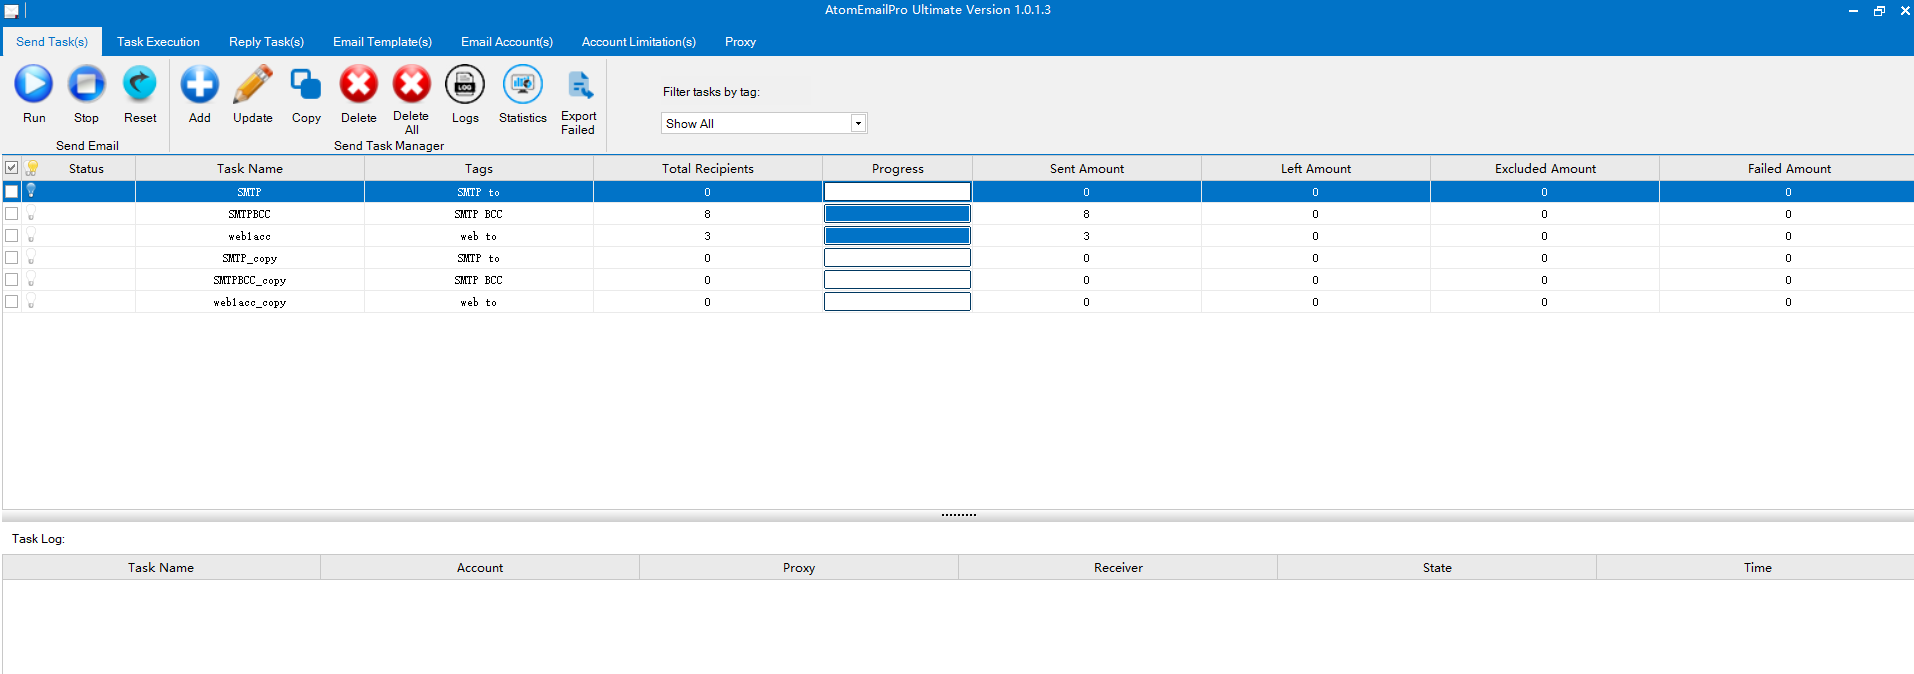
You can view sending logs and data statistics: email open rates and click-through rates on links in the email.
You can export information on failed recipients to a CSV file.
You can filter tasks with the same tag by task tag, batch reset tasks, and edit task names and tag names.
Below are screenshots of the task:
- Select sending accounts, you can choose accounts with the same tag.
- Choose an email template.
- Import recipient emails or variables related to the recipients.
This is an operation video for setting variables.
https://www.youtube.com/watch?v=Z99zDgzyWAI
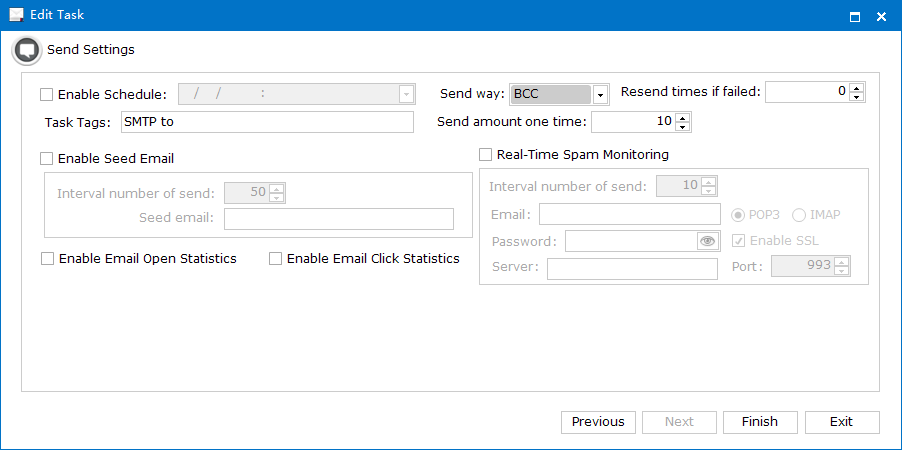
This is the final step before completing task creation:
If using webmail sending, the interface looks like this:
- You can choose to send via TO or BCC.
- If sending via BCC, you can also choose the maximum number of recipients per send (these recipients will receive the email individually).
- You can also set task tags, etc.
If using SMTP sending, the interface looks like this:
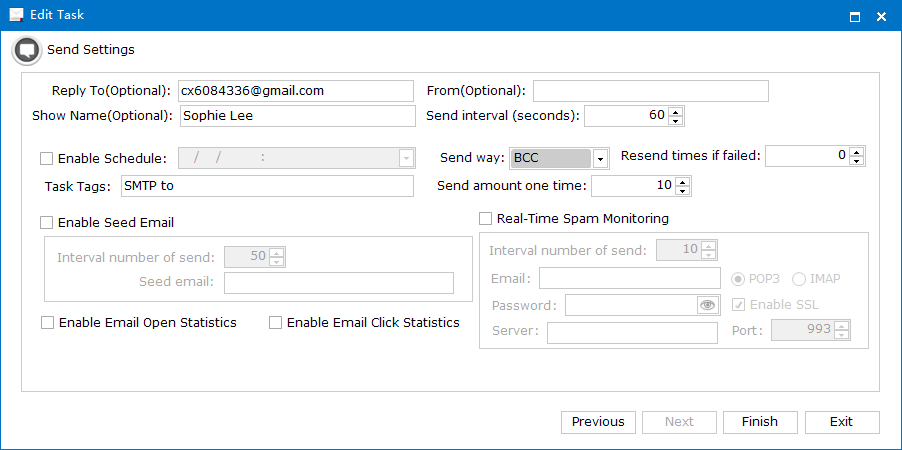
- You can set the reply-to email address.
- You can set the display name.
- You can choose to send via TO or BCC.
- If sending via BCC, you can also choose the maximum number of recipients per send (these recipients will receive the email individually).
- You can also set task tags, etc.
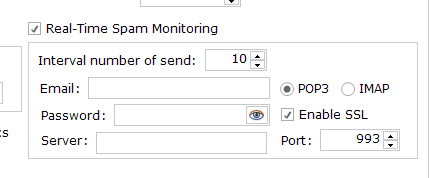
I want to emphasize this feature: real-time monitoring of whether the sent emails enter the spam folder, and if detected, how the system automatically regenerates the email content and sends it again until the email enters the inbox.
Real-time monitoring of task execution process. If the sent email enters spam, our system will automatically regenerate the email content using AI in a timely manner and send it out. This cycle continues until the task is completed, until all emails enter the inbox.
Of course, to use this feature, you need to fill in the following information:
Finally, this is the main email sending interface.
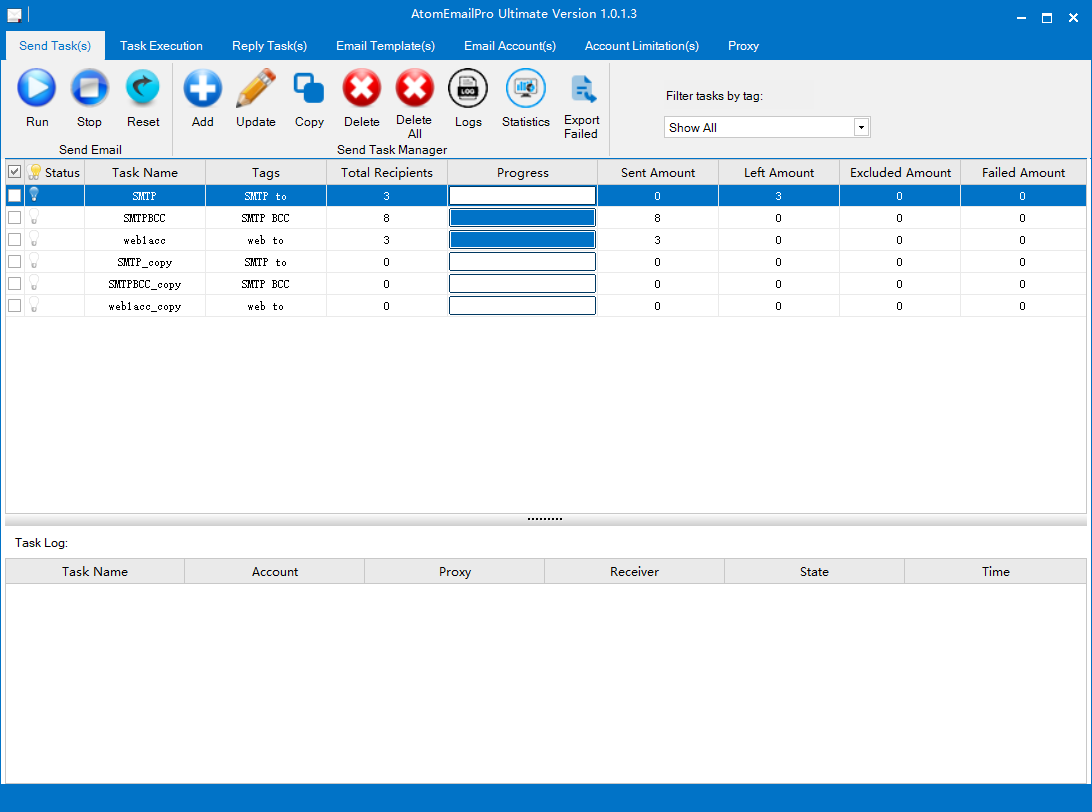
Click "Run" to execute the task.
The software supports multi-threaded sending. Set the number of threads here: